To install a Keurig water filter, remove the water reservoir, take out the old filter, insert the new filter, and reattach the reservoir. Want to enhance the taste of your Keurig coffee?
Installing a Keurig water filter can do just that. By removing impurities such as chlorine and sediments, the filter ensures a clean and refreshing cup of joe every time. But how do you go about installing it? In this guide, we will walk you through the simple steps to replace the old filter with a new one and enjoy a cleaner brew.
So, let’s get started and elevate your coffee experience with a Keurig water filter installation.
Purchasing The Right Keurig Water Filter
Understanding the Importance of a Water Filter in Your Keurig
Installing a water filter in your Keurig coffee maker is essential if you want to enjoy not only great-tasting coffee but also extend the lifespan of your machine. The tap water we use at home often contains impurities like chlorine, minerals, and other contaminants that can affect the flavor of your coffee and clog the internal components of your Keurig. A water filter removes these impurities, ensuring a cleaner and more enjoyable coffee experience.
Researching and Finding the Compatible Keurig Water Filter
Before purchasing a water filter for your Keurig, it’s important to ensure that it is compatible with your specific model. Keurig offers a range of coffee makers, and not all filters are universally compatible. The first step is to identify the model of your Keurig machine. This information can usually be found on the bottom or side of the coffee maker, or in the user manual provided with the machine. Once you have determined the model, you can start researching and finding the compatible water filter.
There are various ways to find the right water filter for your Keurig machine. One option is to visit the official Keurig website and browse through their selection of filters. They generally provide a compatibility chart, so you can easily match your coffee maker model with the appropriate filter. Another option is to consult the user manual, which often includes information about compatible water filters. Additionally, you can search online retailers and read customer reviews to ensure you are making an informed decision.
Comparing Different Brands and Models of Keurig Water Filters
Once you have identified the compatible water filters for your Keurig, it’s time to compare different brands and models to find the best option for you. There are several factors to consider during this process. One of the main factors is the filtration capacity of the filter. A higher filtration capacity means the filter will last longer before needing to be replaced. Additionally, you may want to consider the type of filtration technology used, such as activated charcoal or carbon filters, as these can have an impact on the taste and quality of your coffee.
Another important factor to consider is the price of the water filter. While it’s tempting to go for the cheapest option, it’s important to find the balance between affordability and quality. Cheaper filters may not provide as effective filtration or may need to be replaced more frequently, resulting in higher long-term costs. Reading customer reviews can help you gauge the performance and durability of different brands and models.
Making an informed decision when purchasing your Keurig water filter is crucial to ensure the best coffee experience and machine longevity. By understanding the importance of a water filter, researching the compatible options, and comparing different brands and models, you can confidently purchase the right water filter for your specific Keurig coffee maker.
Preparing Your Keurig For Water Filter Installation
Before installing a water filter in your Keurig machine, it’s essential to properly prepare your appliance. This involves cleaning and maintaining your Keurig, locating the water filter holder, and, if applicable, removing the old water filter. Following these steps ensures a smooth installation and optimal performance of your Keurig machine.
Properly Cleaning and Maintaining Your Keurig
To begin, it’s crucial to clean and maintain your Keurig to ensure the best possible taste in your beverages. Regular cleaning removes any residue or mineral buildup, which can affect the flavor of your coffee or tea. Here’s what you need to do:
- Unplug your Keurig machine and disassemble any removable parts.
- Wash the removable parts, such as the water reservoir and the K-Cup holder, with warm soapy water.
- Using a clean, damp cloth, wipe the exterior of the machine, including the drip tray and the surface around the K-Cup holder.
- Once everything is clean and dry, reassemble the parts and plug the machine back in.
Regularly following these cleaning steps ensures that your Keurig machine is free from any residues or impurities that might affect the taste of your beverages.
Locating the Water Filter Holder in Your Keurig Machine
The next step is to locate the water filter holder in your Keurig machine. The water filter holder is typically located in the water reservoir area. To find it:
- Remove the water reservoir from your Keurig machine.
- Look for a cylindrical compartment at the bottom or side of the reservoir. This is usually where the water filter holder is placed.
- Make sure the water filter holder is empty before proceeding with the installation.
Now that you’ve located the water filter holder, you’re ready to move on to the next step.
Removing the Old Water Filter (if applicable)
If your Keurig machine already has an old water filter, you’ll need to remove it before installing the new one. Here’s how:
- Take hold of the water filter holder and twist it counterclockwise to unlock it.
- Gently pull out the old water filter from the holder.
- Dispose of the old water filter appropriately.
Removing the old water filter ensures that you start with a fresh and clean filter when installing the new one.
Now that your Keurig machine is cleaned, the water filter holder is located, and the old filter (if applicable) is removed, you are ready to continue with the installation of the new water filter. Follow the specific instructions provided with your Keurig water filter kit for successful installation. Enjoy purified and delicious beverages from your Keurig machine!
Installing The Keurig Water Filter
Welcome to our step-by-step guide on how to install the Keurig water filter. Ensuring that you have clean and filtered water is essential for brewing the perfect cup of coffee. The Keurig water filter helps remove impurities from the water, resulting in a better-tasting brew. In this article, we will walk you through the process of unpackaging the new water filter, soaking it for activation, inserting and securing it in the holder, and performing a rinse cycle to initialize the water filter.
<Unpackaging the New Water Filter>
Before you begin, make sure you have the new Keurig water filter at hand. The water filter comes in a packaging that includes the filter cartridge and instructions for installation. Follow these steps to unpack and prepare the new water filter:
- Remove the water filter from its packaging.
- Remove any plastic wrapping or seals from the filter cartridge.
- Inspect the filter cartridge for any visible damage. If you notice any cracks or breakage, do not use the filter and contact Keurig customer support for assistance.
<Soaking the Water Filter for Activation>
Once you have unpacked the new water filter, it’s important to activate it before use. This process involves soaking the filter to remove any residual carbon dust and prepare it for effective filtration. Follow these steps to soak the water filter:
- Fill a bowl or sink with cold water.
- Place the water filter cartridge in the water, ensuring it is completely submerged.
- Allow the water filter to soak for at least 5 minutes to activate the internal filtration system.
<Inserting and Securing the Water Filter in the Holder>
Now that the water filter has been activated, it’s time to insert it into the Keurig water filter holder. The water filter holder is usually located inside the water reservoir of your Keurig coffee maker. Follow these steps to insert and secure the water filter:
- Remove the water reservoir from the Keurig coffee maker.
- Locate the water filter holder inside the reservoir.
- Align the bottom of the water filter cartridge with the opening of the filter holder.
- Push the filter cartridge firmly into the holder until it is securely in place.
- Ensure the top of the water filter cartridge is flush with the top of the filter holder.
That’s it! You have successfully inserted and secured the water filter in the holder, which means you are one step closer to enjoying a great cup of coffee.
<Performing a Rinse Cycle to Initialize the Water Filter>
Lastly, it’s important to perform a rinse cycle to initialize the water filter before brewing your first cup of coffee. This will help clear any remaining residues and ensure optimal filtration. Follow these steps to perform a rinse cycle:
- Fill the water reservoir with clean water.
- Place a cup or mug on the drip tray.
- Start a brew cycle without inserting a K-Cup pod.
- Allow the water to flow through the system and into the cup.
- Dispose of the water in the cup and repeat the rinse cycle one more time.
Once the rinse cycle is complete, the water filter is fully initialized and ready for use. Now you can confidently brew your favorite coffee knowing that the Keurig water filter is providing you with clean and filtered water.
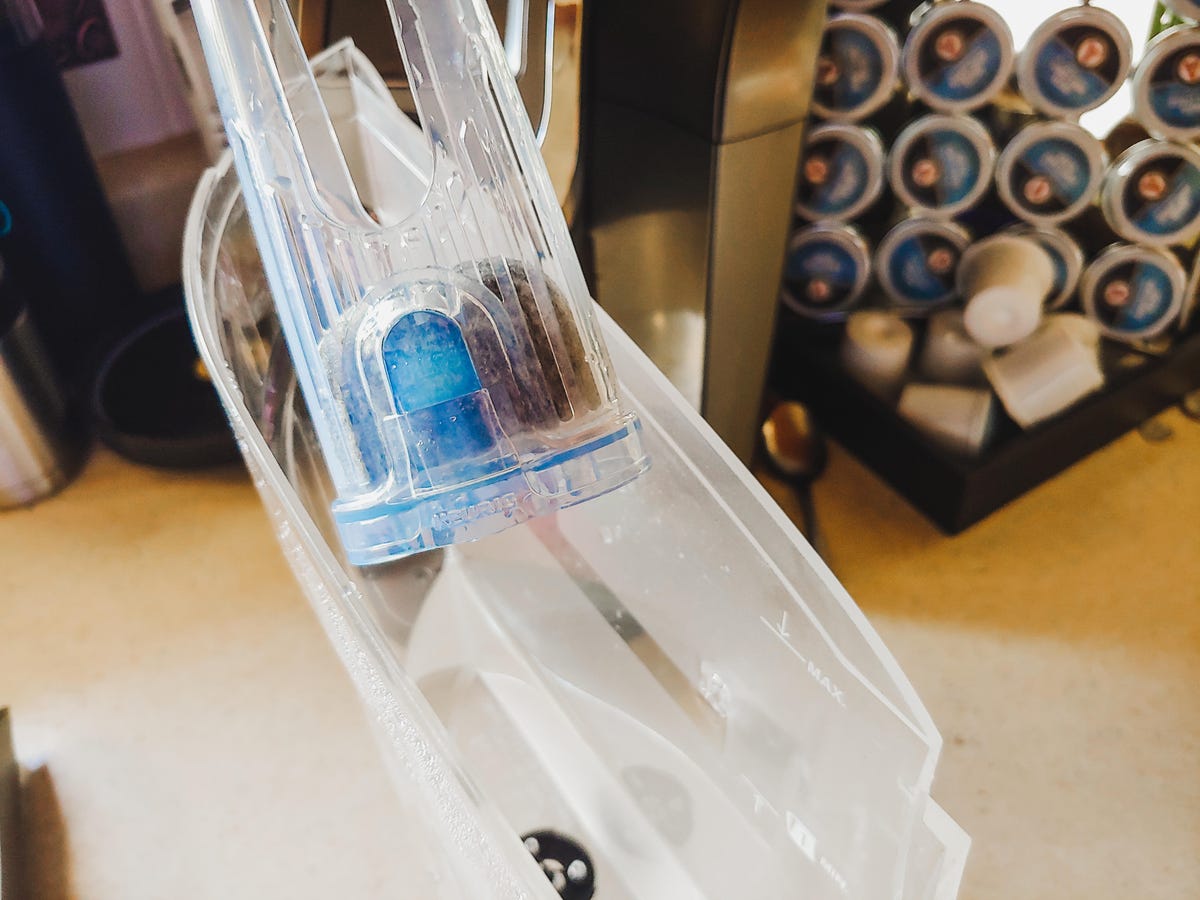
Credit: www.cnet.com
Testing And Maintaining Your Keurig Water Filter
Properly installing and maintaining your Keurig water filter is essential to ensure a fresh, delicious cup of coffee every time. This article will guide you through the process of testing your filter installation, monitoring its lifespan, replacing it when necessary, and performing regular cleaning and maintenance on your Keurig machine.
Running a Test Brew to Ensure Proper Installation
Once you’ve installed a new water filter in your Keurig machine, it’s crucial to run a test brew to confirm that the installation was successful. By following these simple steps, you can ensure that your filter is correctly positioned and functioning as intended:
- Fill the water reservoir with fresh water, making sure not to overfill it.
- Place a clean, empty cup on the drip tray.
- Insert a compatible coffee pod into the K-Cup® pod holder.
- Select your desired brew size and start the brewing process.
- Observe the brewed coffee for any unusual taste or appearance.
If the brewed coffee tastes off or looks abnormal, it may indicate a problem with the water filter installation. In such cases, you should double-check the filter’s position and make sure it is securely in place. Repeating the test brew should help confirm whether or not the issue is resolved.

Monitoring the Lifespan of Your Water Filter
Keurig water filters have a recommended lifespan of approximately two months or 60 tank refills, whichever comes first. This lifespan may vary depending on the hardness of your water and your usage patterns. To ensure that your coffee remains consistently great-tasting, it’s important to monitor the lifespan of your water filter.
Luckily, Keurig machines are equipped with a handy filter reminder feature. This feature acts as a timer to alert you when it’s time to replace the water filter. When the reminder appears on your machine’s display, it’s an indication that the filter’s effectiveness may be compromised, potentially affecting the taste and quality of your coffee.
Replacing the Water Filter when Necessary
When the filter reminder on your Keurig machine indicates that it’s time for a replacement, don’t delay! Replacing the water filter is a simple process that ensures your coffee remains consistently delicious. Follow these steps:
- Soak a new water filter cartridge in cold water for 5 minutes.
- Rinse the filter under cold running water for 60 seconds.
- Insert the filter into the filter assembly, making sure it fits snugly.
- Submerge the filter assembly into the water reservoir and push it down until it clicks into place.
- Fill the water reservoir with fresh water.
Now your Keurig machine is ready to brew perfect cups of coffee again!
Regular Cleaning and Maintenance of Your Keurig Machine
Besides maintaining the water filter, regular cleaning and maintenance of your Keurig machine is crucial for optimal performance and longevity. Ignoring this aspect could lead to unexpected issues and a decline in coffee quality over time. Follow these tips to keep your machine in top shape:
- Regularly clean the water reservoir, drip tray, and pod holder with warm, soapy water.
- Remove any mineral deposits by descaling your machine every three to six months.
- Wipe the exterior of the machine with a damp cloth to remove any spills or stains.
- Check the brewer’s needles periodically and clear any debris that may have accumulated.
- Store the machine in a clean, dry place to prevent dust or other contaminants from entering.
By following these simple cleaning and maintenance practices, you can help ensure that your Keurig machine and water filter continue to deliver fantastic cups of coffee day after day.
Frequently Asked Questions Of How To Install Keurig Water Filter
How Do I Install The Water Filter In My Keurig K Supreme Plus?
To install the water filter in your Keurig K Supreme Plus, follow these steps: 1. Open the top lid of your Keurig machine. 2. Take out the water reservoir and remove the filter holder. 3. Insert the water filter cartridge into the filter holder.
4. Place the filter holder back into the water reservoir. 5. Reinsert the water reservoir into your Keurig machine. Enjoy clean and filtered water for your coffee!
Where Does The Water Filter Go In A Keurig K Cafe?
The water filter for a Keurig K Cafe goes inside the water reservoir.
How Do You Put The Filter In A Keurig K Duo?
To put the filter in a Keurig K Duo, follow these steps: 1. Open the top lid of the machine. 2. Locate the water reservoir at the back. 3. Remove the reservoir and rinse it. 4. Insert the filter into the designated space at the bottom of the reservoir.
5. Fill the reservoir with water and place it back into the machine.
Do You Really Need A Water Filter For A Keurig?
Yes, a water filter is recommended for a Keurig. It helps remove impurities, improving the taste and prolonging the machine’s lifespan.
Conclusion
Installing a Keurig water filter is a simple and effective way to ensure the best quality of your coffee. By following the step-by-step guide provided in this blog post, you can have a hassle-free installation experience. Remember, a well-maintained water filter will significantly enhance the taste and aroma of your favorite beverage.
So, don’t wait any longer – get started on your Keurig water filter installation today!