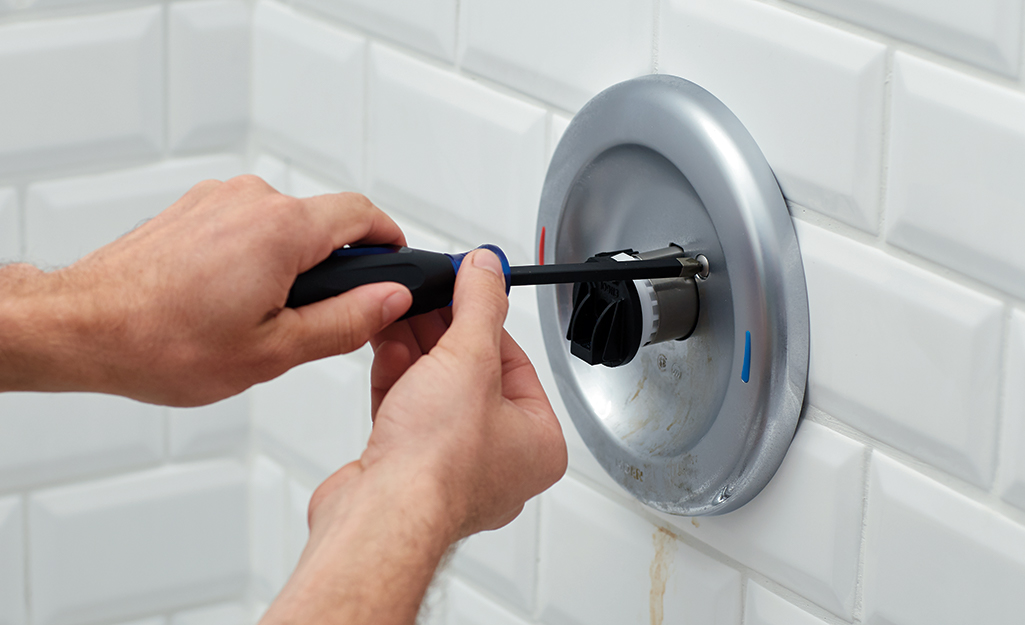
To install a shower faucet, turn off the water supply, remove the old faucet handle and trim, attach the new valve and trim kit, and connect the water supply lines. This step-by-step process will guide you through safely and effectively installing a shower faucet in your bathroom.
Updating your shower faucet is a great way to enhance your bathroom’s functionality and aesthetics. Whether you’re replacing an old and worn-out faucet or want to upgrade to a more modern style, this installation process can be done by following a few simple steps.
We will provide you with a step-by-step guide on how to install a shower faucet properly. So, let’s get started and transform your shower experience!
Credit: www.homedepot.com
Choosing The Right Shower Faucet
Factors to consider when selecting a shower faucet
When it comes to choosing the right shower faucet, there are several important factors to consider. By taking the time to assess your needs and preferences, you can find a faucet that not only enhances the functionality and style of your shower, but also suits your individual requirements. Here are a few key factors to keep in mind:
- Budget: Determine your spending limit before starting your search. This will help you narrow down the options and prevent overspending.
- Type of installation: Consider whether you prefer a wall-mounted faucet or a deck-mounted one. Wall-mounted faucets are popular for their sleek look, while deck-mounted faucets are easier to install.
- Water pressure: Check the water pressure in your home and consult with a professional if needed. This will ensure that you choose a faucet that can accommodate your water pressure for optimal performance.
- Size and compatibility: Measure the space available in your shower and make sure the faucet you select is the right size. Additionally, check to see if the faucet is compatible with your existing plumbing system.
- Style and finish: Consider the overall aesthetic of your bathroom and choose a faucet that complements it. Whether you prefer a traditional, modern, or contemporary style, there are plenty of options available in different finishes, such as chrome, brushed nickel, or bronze.
Exploring different types of shower faucets
Now that we have covered the important factors to consider, let’s explore the different types of shower faucets that are available:
| Type of shower faucet | Description |
|---|---|
| Single-handle faucets | These faucets have one handle that controls both the water flow and temperature. They are easy to use and maintain. |
| Double-handle faucets | With separate handles for hot and cold water, these faucets offer more control over the water temperature. They are a classic choice and add a touch of elegance to any bathroom. |
| Thermostatic faucets | These faucets have precise temperature controls, allowing you to set your desired temperature and maintain it consistently. They also offer safety features, such as anti-scald protection. |
| Pressure-balanced faucets | These faucets are designed to maintain a consistent water temperature regardless of fluctuations in water pressure. They are a popular choice for households with multiple showers or appliances using water simultaneously. |
Finding a shower faucet that suits your needs and preferences
With the multitude of options available, finding a shower faucet that suits your needs and preferences may seem overwhelming. However, by considering the factors mentioned above and exploring the various types of faucets, you can make an informed decision. Remember to prioritize functionality, quality, and style to ensure that you choose a shower faucet that enhances your showering experience and complements your bathroom decor.
Assessing Your Plumbing System
Before diving into the installation process of a shower faucet, it is crucial to assess your existing plumbing system and ensure that it is compatible. This evaluation will not only save you time and effort but also help you avoid unnecessary modifications or adjustments. In this section, we will guide you on understanding your existing plumbing setup, evaluating the compatibility of the shower faucet with your plumbing system, and determining if any modifications or adjustments are necessary.
<h3>Understanding your existing plumbing setup</h3>
The first step in assessing your plumbing system is to familiarize yourself with the existing setup. This includes understanding the location of the water supply lines, the types of pipes used, and the layout of your bathroom plumbing. Take note of any existing valves or outlets connected to your shower area. This initial understanding will provide valuable insight into how the shower faucet installation should be approached.
<h3>Evaluating the compatibility of the shower faucet with your plumbing system</h3>
Once you have a good grasp of your plumbing setup, the next step is to evaluate the compatibility of the new shower faucet with your existing system. Look for information provided by the manufacturer to determine if the faucet is compatible with your type of pipes, water pressure, and valve connections. Additionally, ensure that the faucet’s dimensions and design will fit seamlessly into your current shower area. This evaluation will help prevent any issues or incompatibilities during the installation process.
<h3>Determining if any modifications or adjustments are necessary</h3>
After assessing your plumbing system and determining the compatibility of the shower faucet, it’s time to identify if any modifications or adjustments are required. This could involve making changes to the water supply lines, upgrading valves or outlets, or even replacing portions of the existing plumbing. Carefully examine the details provided by the manufacturer and compare them with your current setup. If modifications are necessary, it is advisable to consult a professional plumber to ensure that the changes are done correctly and safely.
In conclusion, assessing your plumbing system is a critical first step when installing a new shower faucet. Understanding your existing plumbing setup, evaluating compatibility, and determining if any modifications are necessary will help ensure a successful installation process. By taking the time to assess your plumbing system, you can minimize complications and enjoy a fully functional and compatible shower faucet for years to come.
Gathering The Necessary Tools And Materials
When it comes to installing a shower faucet, gathering the necessary tools and materials is an essential first step. Having the right tools and materials on hand can make the installation process much smoother and ensure a successful outcome. In this section, we will discuss the essential tools you will need, the required materials for a successful installation, and tips for obtaining the right parts and components.
Essential tools for installing a shower faucet
Before you begin installing a shower faucet, make sure you have the following tools:
- Adjustable wrench
- Plumber’s tape
- Pipe cutter
- Phillips screwdriver
- Flathead screwdriver
- Allen wrench
- Plumbing pliers
- Tubing cutter
- Utility knife
- Measuring tape
- Pencil
Having these tools within reach will allow you to tackle any challenges that may arise during the installation process.
Required materials for a successful installation
In addition to the tools, it is important to gather the necessary materials for installing a shower faucet. Here is a list of the required materials:
| Materials | Description |
|---|---|
| Shower faucet | The main component of your shower system |
| Valve | To control the water flow and temperature |
| Pipe fittings | To connect the various plumbing components |
| Showerhead | Where the water flows out |
| Flanges | To cover and protect the pipe connections |
| Plumber’s putty | To create a watertight seal |
| Teflon tape | To prevent leaks |
| Shower arm | Connects the showerhead to the water source |
| Drain assembly | Collects and drains the water |
| Pipe and tubing | To create the plumbing connections |
Gathering these materials beforehand will save you time and ensure a smooth installation process.
Tips for obtaining the right parts and components
When it comes to obtaining the right parts and components for your shower faucet installation, it’s important to keep a few tips in mind:
- Measurements: Take accurate measurements of your existing plumbing components to ensure the new parts you purchase will fit properly.
- Compatibility: Check the compatibility of the parts you are considering to ensure they will work together seamlessly.
- Quality: Invest in high-quality parts and components to ensure durability and longevity.
- Research: Do thorough research and read reviews before purchasing to ensure the parts and components you choose are reliable and well-regarded by others.
- Consult professionals: If you are unsure about which parts to purchase, consult with a professional plumber who can provide guidance and recommendations.
By following these tips, you can ensure that you have the right parts and components for a successful shower faucet installation.
Removing The Old Shower Faucet
Preparatory steps before removing the old faucet
Before you can begin the process of removing your old shower faucet, there are a few preparatory steps you need to take to ensure a smooth and successful removal. These steps will help you avoid any unexpected challenges and ensure you have all the necessary tools and materials on hand.
Here are the preparatory steps you should follow:
- Gather the necessary tools: Before you start the removal process, make sure you have all the tools you will need. These may include an adjustable wrench, pliers, screwdriver, and a pipe cutter or hacksaw.
- Turn off the water supply: Locate the main water shut-off valve for your shower and turn it off. This will prevent any water from flowing while you are working on removing the faucet.
- Protect the shower area: Cover the shower floor with a drop cloth or old towel to protect it from any debris or potential damage during the removal process.
- Inspect the existing faucet: Take a close look at your existing shower faucet to familiarize yourself with its components and how it is attached to the wall. This will help you better understand the removal process.
- Take measurements: Before removing the old faucet, measure the distance between the valve and the showerhead. This will ensure that the new faucet you install will fit properly.
Step-by-step guide to removing the existing shower faucet
Now that you have completed the preparatory steps, you can begin removing the old shower faucet. Follow this step-by-step guide to ensure a successful removal process:
- Locate the faucet screws: Look for screws or mounting nuts that are securing the shower faucet to the wall or shower valve. These screws or nuts are typically located behind the faucet handle or trim plate.
- Remove the screws or nuts: Use an appropriate tool, such as a screwdriver or pliers, to unscrew or remove the screws or nuts. Be careful not to strip the screws or damage the surrounding area.
- Detach the faucet handle: Once the screws or nuts are removed, carefully pull off the faucet handle. You may need to wiggle it a bit to loosen it.
- Remove the trim plate: With the handle off, you should be able to see the trim plate or escutcheon. Gently pry it off using a screwdriver or your fingers.
- Identify and disconnect the water supply lines: Locate the water supply lines connected to the faucet. Use an adjustable wrench or pliers to disconnect them from the faucet.
- Disconnect the showerhead: If your showerhead is attached directly to the faucet, unscrew it using an adjustable wrench.
- Remove the old faucet: With all the connections detached, carefully pull the old faucet away from the wall or shower valve. You may need to use a bit of force if it is stuck.
Troubleshooting common challenges during removal
While removing the old shower faucet is generally straightforward, you may encounter some common challenges along the way. By being aware of these challenges, you can troubleshoot and overcome them, ensuring a smooth removal process:
- Stuck screws or nuts: If the screws or nuts are difficult to remove, try using penetrating oil to loosen them. You can also use a wrench with more leverage or apply heat using a hairdryer to expand the metal slightly.
- Tight connections: If the water supply lines or showerhead connections are tight and difficult to disconnect, use pliers or an adjustable wrench to provide extra grip. Be careful not to apply too much force, as it may damage the connections.
- Stubborn faucet: If the old faucet is stubborn and won’t come off easily, try using a pipe cutter or hacksaw to carefully cut through the faucet, making sure not to damage the wall or shower valve.
By following these troubleshooting steps, you will be better equipped to handle any challenges that arise during the removal process, making the installation of your new shower faucet a breeze.
Installing The New Shower Faucet
Installing a new shower faucet can be a refreshing upgrade for your bathroom. Not only does it enhance the aesthetics of your space, but it also improves the overall functionality of your shower. In this section, we will guide you through the simple steps to install a new shower faucet. By following these instructions, you’ll be able to transform your shower into a haven of relaxation and rejuvenation.
Preparing the Installation Area for the New Faucet
To ensure a smooth installation process, it’s crucial to prepare the installation area properly. Start by turning off the main water supply to avoid any unwanted leaks or spills. Next, remove the existing shower faucet, including the handle, trim plate, and escutcheon, by unscrewing them and disconnecting any water supply lines.
Before installing the new faucet, make sure the installation surface is clean and free from any debris or old sealant. Use a mild detergent and water to clean the area, and ensure it is thoroughly dry before proceeding.
Connecting the New Faucet to the Water Supply
Now that the installation area is ready, it’s time to connect the new shower faucet to the water supply. Start by applying a thin layer of plumber’s putty around the base of the faucet. This will create a watertight seal and prevent any leaks.
Gently thread the faucet onto the water supply stub-outs, ensuring that it is aligned correctly. Use an adjustable wrench to tighten the connections, but be careful not to overtighten, as it may damage the fittings.
If your new shower faucet requires any additional connections, such as a hand shower or a diverter, refer to the manufacturer’s instructions for proper installation guidelines.
Securing the Faucet in Place and Ensuring Proper Alignment
Once the new faucet is connected to the water supply, it’s crucial to secure it in place and check for proper alignment. Double-check that the faucet is level and centered before proceeding.
Using the included screws or mounting hardware, secure the trim plate and escutcheon onto the installation surface. Make sure to follow the manufacturer’s instructions for the specific mounting method of your faucet.
After securing the faucet, turn on the main water supply and check for any leaks. If you notice any leaks, tighten the connections slightly until the leaking stops. Always remember to proceed with caution to avoid damaging the faucet or the water supply lines.
In conclusion, installing a new shower faucet is a straightforward process that can significantly enhance your bathroom experience. By following these simple steps and with some basic tools, you can bring a touch of elegance and functionality to your shower. Enjoy the convenience and luxury of your new shower faucet!
Testing And Fine-Tuning The Shower Faucet
Once you have successfully installed your new shower faucet, it’s time to test and fine-tune its functionality. This crucial step ensures that everything is working smoothly and to your liking. In this section, we will cover important checks and adjustments to make, such as checking for leaks, addressing any plumbing issues, adjusting temperature and water flow settings, and verifying the overall functionality of the new shower faucet.
Checking for leaks and addressing any plumbing issues
After installing the shower faucet, it’s essential to check for leaks to prevent any water damage. Follow these steps to ensure a leak-free installation:
- Close the shower faucet handles or valves to stop the water flow.
- Inspect all the connections, including the showerhead, the shower arm, and the faucet handles, for any signs of leaks or drips.
- If you notice any leaks, use a wrench or pliers to tighten the connections. Remember not to overtighten, as it may cause damage.
- Turn on the water supply and check again for any leaks. Repeat the tightening process, if necessary.
Additionally, if you encounter any plumbing issues such as weak water pressure or unusual noises, consult a professional plumber to address these concerns promptly.
Adjusting temperature and water flow settings
Before enjoying your shower, it’s important to set the desired temperature and water flow. Here’s how you can adjust these settings:
- Locate the temperature control knob or lever on your shower faucet.
- Turn the knob or lever to the desired temperature. Some faucets may have temperature markers or indicators to guide you.
- To adjust the water flow, locate the flow control knob or lever, typically found near the temperature control.
- Turn the flow control knob or lever to increase or decrease the water flow according to your preference.
Remember to test the water temperature and flow by turning the shower faucet on. Make any necessary adjustments to achieve your desired settings.
Verifying the functionality of the new shower faucet
Once you have addressed leaks, plumbing issues, and adjusted the temperature and water flow, it’s time to verify the overall functionality of your new shower faucet. Here are some key aspects to check:
- Ensure both hot and cold water handles or valves are working correctly.
- Test the diverter, if applicable, to redirect water between different shower outlets (e.g., showerhead, handheld shower).
- Check if the showerhead delivers a consistent and even stream of water.
- Verify that all buttons, knobs, or levers operate smoothly and without resistance.
If you notice any issues during this verification process, make the necessary adjustments or consult a professional to ensure your shower faucet is functioning optimally.
By following these steps and ensuring the proper functioning of your shower faucet, you can enjoy a refreshing and satisfying shower experience every time.
Tips For Maintenance And Care
Proper Cleaning and Maintenance Practices for Your Shower Faucet
Maintaining your shower faucet properly is essential for ensuring its longevity and optimal performance. By following these cleaning and maintenance practices, you can keep your shower faucet in top shape:
- Regularly clean the exterior: Wipe the surface of your shower faucet with a soft cloth or sponge to remove any dirt, grime, or soap residue. Avoid using abrasive cleaners or harsh chemicals that can damage the finish.
- Check for leaks: Inspect your shower faucet for any signs of leaks or drips. If you notice any, promptly address the issue to prevent water wastage and potential damage to your bathroom.
- Clean the aerator: Over time, mineral deposits can accumulate in the aerator, affecting water flow. Unscrew the aerator, soak it in vinegar overnight, and then scrub it gently with a toothbrush to remove any buildup.
- Ensure proper ventilation: Proper airflow is crucial to prevent the growth of mold and mildew in your shower area. After each use, ensure that the bathroom is well-ventilated by opening windows or using the exhaust fan.
- Inspect the cartridge: The cartridge is a vital component of the shower faucet that controls water flow and temperature. Regularly check for any signs of wear or damage. If necessary, replace the cartridge according to the manufacturer’s instructions.
Troubleshooting Common Issues and How to Fix Them
Occasionally, you may encounter common issues with your shower faucet. Here are some troubleshooting tips to help you resolve them:
| Issue | Possible Cause | Solution |
|---|---|---|
| Low water pressure | Clogged aerator or water supply issues | Clean or replace the aerator, check water supply valves |
| Uneven water temperature | Improper cartridge alignment or worn-out cartridge | Adjust the cartridge or replace it if necessary |
| Dripping faucet | Worn-out rubber washers or faulty cartridge | Replace rubber washers or cartridge following manufacturer’s instructions |
Extending the Lifespan of Your Shower Faucet through Regular Care
Proper care and maintenance can significantly extend the lifespan of your shower faucet. Here are some additional tips to ensure its longevity:
- Use gentle cleaners: Avoid harsh chemicals or abrasive cleaners that can damage the faucet’s finish or internal components. Opt for mild soaps or specifically formulated faucet cleaners.
- Fix issues promptly: Address any leaks, drips, or malfunctions as soon as you notice them. Delaying repairs can lead to further damage and costly repairs down the line.
- Protect the finish: Use caution when installing or adjusting your shower faucet to prevent scratches or dents. Consider using a silicone-based wax to protect the faucet’s finish from tarnishing or discoloration.
- Regularly inspect seals: Check the seals around your shower faucet for signs of wear or deterioration. Replace them if necessary to prevent water leaks and potential water damage.
By following these tips for maintenance and care, you can keep your shower faucet in excellent working condition for years to come.
Enhancing Your Shower Experience
Exploring additional features and accessories for your shower faucet
Upgrading your shower system for improved comfort and functionality
Tips for creating a relaxing and enjoyable shower environment
Enhancing your shower experience goes beyond just installing a shower faucet. With the right features, accessories, and upgrades, you can transform your shower into a luxurious oasis. From exploring additional features and accessories for your shower faucet to upgrading your shower system for improved comfort and functionality, let’s dive into some ideas that will take your showers to the next level.
Exploring additional features and accessories for your shower faucet
When it comes to shower faucets, there are plenty of additional features and accessories that can enhance your shower experience. One popular option is a handheld showerhead, which allows for greater flexibility in directing the water flow and is perfect for rinsing hard-to-reach areas or washing children and pets. Another feature to consider is a rainfall showerhead, which simulates the feeling of showering in a gentle rainstorm, providing a refreshing and invigorating experience.
Additionally, you can explore different types of shower panels that come with built-in features such as body jets, thermostatic controls, and LED lights. These panels not only add an aesthetic appeal to your shower but also offer a personalized and soothing water massage experience. Don’t forget about shower shelves and storage solutions, which can declutter your shower space and keep all your essentials within reach.
Upgrading your shower system for improved comfort and functionality
If you’re truly committed to elevating your shower experience, consider upgrading your entire shower system. This involves replacing not just the faucet but also the shower valve, showerhead, and other components. By doing so, you can ensure optimal water pressure, temperature control, and overall functionality.
One popular upgrade option is a thermostatic shower valve, which allows for precise temperature control and eliminates sudden fluctuations in water temperature. This is especially beneficial for families with young children or anyone who enjoys a consistent and comfortable shower experience. Upgrading to a high-pressure showerhead can also make a noticeable difference, providing a more invigorating and full-body spray.
To further enhance your shower system, consider installing a water filter or a water softener. These accessories can help improve the quality of your water, reducing impurities and minerals that can affect the efficiency and lifespan of your shower components. By upgrading your shower system, you not only improve comfort but also ensure its longevity.
Tips for creating a relaxing and enjoyable shower environment
Creating a relaxing and enjoyable shower environment involves more than just the hardware. It’s about setting the right atmosphere and taking the time to indulge in self-care. Here are a few tips to help you create the perfect ambiance:
- Invest in good lighting. Consider installing dimmable lights or using candles to create a soothing and calming atmosphere.
- Choose a shower curtain or door that complements your bathroom decor and adds a touch of elegance.
- Add plants or natural elements to bring a sense of serenity and freshness to your shower space.
- Use high-quality bath products with relaxing scents, such as lavender or eucalyptus, to enhance your shower experience.
- Play soft music or soothing sounds to create a tranquil environment.
By incorporating these tips, you can transform your daily showers into a rejuvenating and therapeutic experience, leaving you feeling refreshed and revitalized.
Frequently Asked Questions Of How To Install A Shower Faucet
How Do You Attach A Shower Head To A Faucet?
To attach a shower head to a faucet, follow these steps: 1. Unscrew the existing shower head from the faucet. 2. Clean the thread on the faucet to remove any debris. 3. Wrap Teflon tape around the faucet threads to ensure a tight seal.
4. Screw the shower head onto the faucet, making sure it is secure. 5. Test the connection by turning on the water and checking for leaks.
Do You Have To Cut A Hole In A Wall To Replace A Shower Valve?
No, you don’t need to cut a hole in the wall to replace a shower valve. The shower valve can be accessed by removing the trim or faceplate on the handle. It’s a straightforward process that doesn’t require any major wall modifications.
Do Plumbers Install Shower Faucets?
Yes, plumbers do install shower faucets. They have the expertise to properly install and ensure the functionality of shower faucets in your bathroom.
How Do You Replace A Shower Faucet?
To replace a shower faucet, start by turning off the water supply. Remove the old faucet’s handle, trim plate, and escutcheon. Unscrew the valve cartridge and disconnect any connections. Install the new faucet by reversing the steps and making sure everything is secure.
Turn the water supply back on and test for leaks.
Conclusion
To sum up, installing a shower faucet may seem daunting at first, but with the right tools and knowledge, it can be a straightforward process. Remember to turn off the water supply, follow the manufacturer’s instructions, and take your time to ensure a secure installation.
By following these steps, you can enjoy a functioning and stylish shower faucet in no time. Happy plumbing!