To install a sediment filter, first, turn off the water supply, then, locate the main water line and cut it, ensuring to leave enough space to accommodate the filter. Lastly, connect the filter assembly to the main water line and turn on the water supply.
Installing a sediment filter in your home’s water system can help remove impurities such as sand, dirt, and rust, ensuring clean and safe water for consumption. This guide will walk you through the simple steps required to install a sediment filter.
By following these steps, you can easily and efficiently install a sediment filter and improve your water quality.
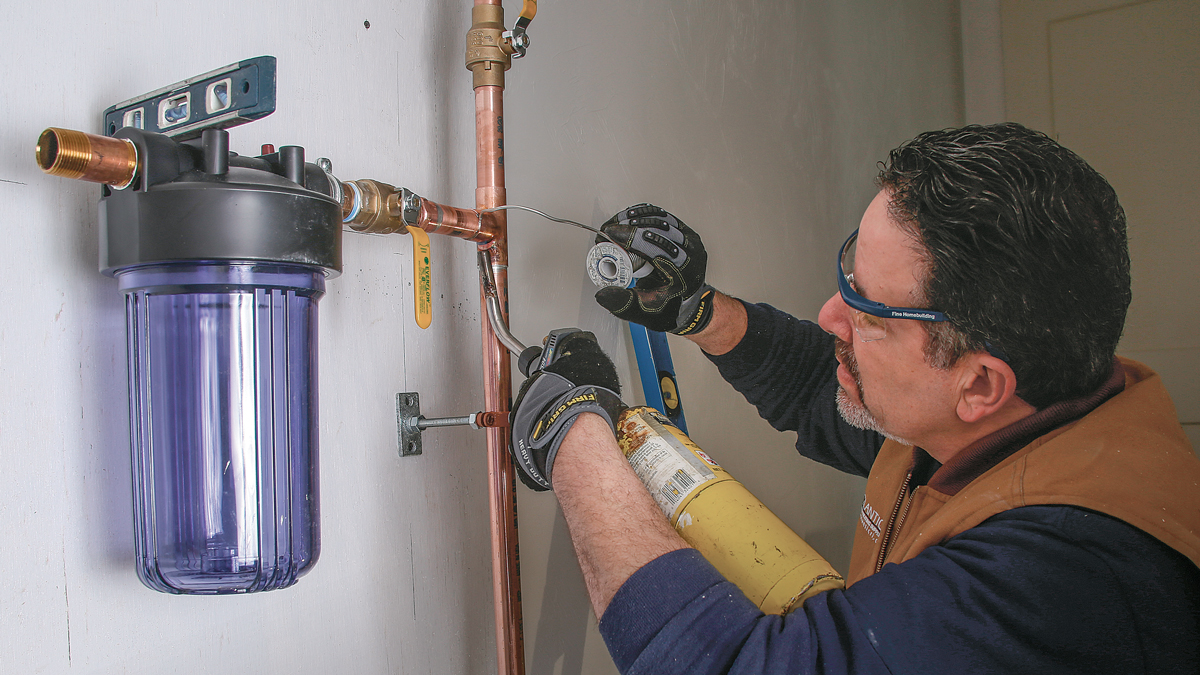
Credit: www.finehomebuilding.com
Understanding Sediment Filters: What They Are And How They Work
When it comes to maintaining the quality of your water supply, installing a sediment filter is an important step. Understanding sediment filters and how they work will help you make informed decisions when it comes to choosing a proper water filtration system. In this post, we will cover the basics of sediment filters, including what they are, how they work, and the importance of having them in your water filtration system.
What is a sediment filter?
A sediment filter is a type of water filter that is specifically designed to remove suspended particles, such as sand, silt, and larger debris, from your water supply. These filters are usually made of pleated or spun polypropylene, which allows water to flow through while trapping and removing the sediment particles.
How does a sediment filter work?
A sediment filter works by utilizing its physical barrier to catch and retain sediment particles from the water flowing through it. When water passes through the filter, the sediment particles become trapped in the filter media. The filter’s construction, such as its pleats or fibers, creates a larger surface area for the filtration process, allowing for efficient removal of sediment.
Sediment filters are typically rated based on their micron rating, which indicates the size of particles that the filter can effectively remove. The lower the micron rating, the smaller the particles that the filter can capture.
It’s important to note that sediment filters are only effective at removing solid particles and do not remove dissolved contaminants or chemicals from the water. For comprehensive water purification, sediment filters are often used in combination with other filtration technologies, such as activated carbon filters or reverse osmosis systems.
The importance of sediment filters in water filtration systems
Sediment filters play a crucial role in water filtration systems by preventing the entry of larger particles into the system. The sediment particles, if left untreated, can clog pipes, damage appliances, and affect the overall performance of your water treatment system. By installing a sediment filter, you can ensure that the water flowing through your system is free from these harmful particles, safeguarding your plumbing and enhancing the lifespan of other filtration components.
Additionally, sediment filters also improve the taste, odor, and clarity of your water by removing visible particles that may cause cloudiness or unpleasant smells. By effectively removing sediment, these filters contribute to a cleaner, healthier, and more enjoyable water supply.
In conclusion, sediment filters are an essential component of any water filtration system. They work by physically trapping and removing suspended sediment particles, providing improved water quality and protecting the overall integrity of your water treatment system. Consider installing a sediment filter to enhance the performance and longevity of your water filtration system for years to come.
Assessing Your Water: Determining If A Sediment Filter Is Needed
Before diving into the installation process of a sediment filter, it’s essential to assess the quality of your water. Sediment refers to any solid particles that can be found in your water supply, such as dirt, sand, rust, or debris. These particles can affect the taste, smell, and overall quality of your water. Determining if a sediment filter is needed requires identifying the signs of sediment in your water and conducting a water quality test.
Signs of sediment in your water
If you’re unsure whether your water contains sediment, there are several telltale signs to look out for. Identifying these signs can help you determine if a sediment filter is necessary for your home:
- Visible particles: Do you notice tiny particles floating in a glass of water or settling at the bottom?
- Turbidity: Does your water appear cloudy or murky?
- Discoloration: Is your water yellow, orange, brown, or reddish instead of clear?
- Sediment buildup: Do you frequently find sediment accumulations in your plumbing fixtures or appliances?
Conducting a water quality test
To accurately assess the presence of sediment in your water, conducting a water quality test is recommended. This test will provide objective results and help you make an informed decision regarding the installation of a sediment filter. You can either purchase a water testing kit from a local store or contact a professional to conduct the test for you. The test results will indicate the exact levels of sediment and other impurities present in your water supply.
When and why to install a sediment filter
Once you have determined the presence of sediment in your water, it’s crucial to understand when and why to install a sediment filter. A sediment filter is necessary if:
- Your water source is prone to sediment contamination, such as well water or water from a lake or river.
- You frequently experience clogged pipes, water discoloration, or reduced water pressure due to sediment buildup.
- Your water quality test shows elevated levels of sediment particles.
By installing a sediment filter, you can effectively remove these particles, ensuring cleaner, clearer, and better-tasting water for you and your family.
Choosing The Right Sediment Filter For Your Needs
When it comes to installing a sediment filter in your home, choosing the right one to meet your needs is essential. A sediment filter helps to remove solid particles, such as dirt, sand, rust, and debris, from your water supply, ensuring cleaner and clearer water. However, with various types of sediment filters available in the market, selecting the right one can be a bit overwhelming. To help you make an informed decision, here are some factors to consider when choosing a sediment filter for your home.
Types of sediment filters available
Before you select a sediment filter, it’s important to understand the different types available. Sediment filters are typically classified based on the filtration media they use. Here are three commonly used sediment filters:
| Type of Sediment Filter | Description |
|---|---|
| Spun or Wound Sediment Filter | This type of filter uses layers of spun or wound polypropylene string or yarn to effectively trap sediment particles as water passes through. It is generally a cost-effective option. |
| Pleated Sediment Filter | The pleated sediment filter is made from a pleated polyester, cellulose, or synthetic material sheet. It offers a larger surface area for filtration, which allows for higher flow rates and longer filter life. |
| Screen Sediment Filter | This type of filter has a screen-like structure made of stainless steel or other durable materials. It is effective in removing larger particles but may not provide filtration for finer sediments. |
Factors to consider when selecting a sediment filter
When selecting a sediment filter, consider the following factors:
- Water Source: Determine the source of your water supply. Is it a well, municipal water, or rainwater? The type and amount of sediment present in your water can help determine the ideal filter for your needs.
- Flow Rate: Assess the flow rate required for your household. Different sediment filters have different flow rate limitations, so ensure that the filter you choose can handle the water demand.
- Micron Rating: Micron rating indicates the size of particles the sediment filter can effectively remove. Consider the level of filtration you need; finer sediments require filters with lower micron ratings.
- Filter Lifespan: Evaluate the lifespan of the sediment filter. Some filters need frequent replacements, while others offer longer service intervals. Choose a filter that aligns with your maintenance preferences.
- Budget: Finally, assess your budgetary constraints. Sediment filters come in various price ranges, and it’s important to choose one that fits your budget without compromising on quality.
Understanding micron ratings and flow rates
Micron rating and flow rate are crucial specifications to consider when selecting a sediment filter. Micron rating refers to the filter’s ability to capture particles of a specific size. The lower the micron rating, the finer the filtration. Flow rate, on the other hand, indicates the maximum speed at which water can flow through the filter. It is typically measured in gallons per minute (GPM) or liters per minute.
Higher micron ratings are suitable for removing larger particles, such as sand or silt, while lower micron ratings are better for capturing finer sediments like dirt or rust. Balancing the flow rate and micron rating ensures an effective sediment filter that meets your specific filtration requirements.
By considering these factors and understanding the importance of micron ratings and flow rates, you’ll be well-equipped to choose the right sediment filter for your needs. Remember, selecting a high-quality sediment filter is essential not only for better water quality but also for protecting your appliances and plumbing systems in the long run.
Gathering The Necessary Tools And Materials
When it comes to installing a sediment filter, gathering the necessary tools and materials is the first step towards a successful installation. Without the right tools and materials, the installation process can become frustrating and time-consuming. In this section, we will discuss the tools required for the installation and the materials needed to install a sediment filter.
Tools required for the installation
Before starting the installation process, make sure you have the following tools ready:
- A wrench or pliers to loosen and tighten the fittings
- A pipe cutter or hacksaw to cut the pipe
- A tape measure to ensure proper placement
- A screwdriver for securing the filter housing
- Teflon tape for sealing the fittings
Materials needed to install a sediment filter
In addition to the tools mentioned above, you will also need the following materials:
- A sediment filter unit with filter cartridge
- Suitable mounting hardware for securing the filter unit
- Appropriate fittings and connectors for your plumbing system
- PVC or copper pipe for connecting the filter unit to the main water line
- A compression sleeve and nut for attaching the filter unit to the pipe
Ensuring proper safety precautions
When working with plumbing systems, it is essential to take proper safety precautions to avoid any mishaps or injuries. Here are a few safety tips to keep in mind:
- Always shut off the main water supply before starting the installation process.
- Use caution when cutting pipes to avoid any accidental injuries. Wear safety glasses and gloves for added protection.
- Follow the manufacturer’s instructions carefully to ensure proper installation and usage of the sediment filter.
- If you are unsure about any step of the installation process, it is always recommended to seek professional assistance.
Finding The Ideal Location For The Sediment Filter
Determining the Best Placement for the Sediment Filter
When it comes to installing a sediment filter, finding the ideal location is crucial for its optimal performance. The placement of your sediment filter can significantly impact its effectiveness and durability. To ensure you make the right decision, consider the following factors when selecting a location:
Factors to Consider When Selecting a Location
To determine the best placement for your sediment filter, take into account the following factors:
- Proximity to the Main Water Supply: Locate the sediment filter as close as possible to the point where your water enters your home. By positioning it near the main water supply, you can effectively catch and remove sediments before they reach your plumbing fixtures and appliances.
- Accessibility for Installation and Maintenance: Choose a location that allows for easy installation and future maintenance. Ensure there is sufficient space around the filter for convenient access during filter replacement or cleaning.
- Protection from Extreme Temperature: Avoid installing the sediment filter in areas prone to freezing temperatures or direct sunlight. Extreme temperatures can damage the filter material or affect its performance. Look for a sheltered or indoor space to protect the filter from such conditions.
- Water Pressure Considerations: Sediment filters function best when water flows through them at proper pressure. Check the recommended pressure range specified by the manufacturer and select a location that can maintain this pressure. Avoid areas with excessively low or high water pressure.
- Avoiding Obstacles: Ensure that there are no obstacles, such as electrical lines or other plumbing components, obstructing the installation of the sediment filter. This will allow for a smooth installation process and prevent any interference with other existing systems.
Ensuring Easy Access for Maintenance and Replacement
Once you have determined the best location for your sediment filter, it is essential to guarantee easy access for maintenance and replacement. Plan for a space that allows you to comfortably reach the filter, providing enough room for filter removal, cleaning, or replacement. Remember, regular maintenance is crucial for the continued effectiveness of the sediment filter, so make sure it is easily accessible to avoid any inconvenience in the future.
Preparing The Water Supply For Installation
Before installing a sediment filter, it is crucial to properly prepare the water supply. Taking the necessary steps to prepare your water supply will ensure a smooth installation process and maximize the effectiveness of your sediment filter. In this section, we will cover the essential steps you need to follow to prepare your water supply for installation.
Shutting off the main water supply
Begin by shutting off the main water supply to your home or the specific area where you plan to install the sediment filter. This step is vital to avoid any potential water leaks or accidents during the installation process. Locate the main water shut-off valve, typically found near your water meter or outside your home near the street, and turn it off completely. Ensure that the valve is tightly closed and that no water flows through the pipes.
Draining the pipes to eliminate remaining water
Once the main water supply is turned off, you need to drain the pipes to eliminate any remaining water. Start by opening all faucets, including outdoor spigots, showers, and sinks, both hot and cold. Additionally, flush all toilets in your home to release any residual water in the plumbing system. Allow the water to run until it stops flowing entirely. This process ensures that there is no remaining water in the pipes that could hinder the installation of the sediment filter.
Understanding the specific requirements for your water system
Every water system is unique, and it is essential to understand the specific requirements before installing a sediment filter. Consult your manufacturer’s instructions and guidelines to determine the necessary specifications for your filter, such as flow rate capacities, pressure limitations, and compatibility with your plumbing materials. By adhering to these specific requirements, you can ensure that your sediment filter operates effectively and efficiently in your water system.
By following these important steps to prepare your water supply for installation, you are setting the foundation for a successful sediment filter installation. Shutting off the main water supply, draining the pipes, and understanding the specific requirements for your water system will enable you to proceed with confidence and optimize the performance of your sediment filter.
Stay tuned for the next section as we delve into the installation process itself.
Installing The Sediment Filter
One of the most important steps in ensuring clean and safe water is by installing a sediment filter. This device helps to remove any solid particles, such as sand, silt, rust, or debris that may be present in your water supply. Installing a sediment filter is a relatively simple process that can be done at home. In this guide, we will walk you through the steps to assemble the components, connect the filter to the water supply line, and secure it in place using brackets or mounting options.
Assembling the sediment filter components
The first step in installing a sediment filter is to assemble all the necessary components. Before you begin, make sure you have the following items:
- Sediment filter housing
- Sediment filter cartridge
- Wrench or pliers
- Teflon tape
Start by unscrewing the bottom cap of the filter housing and removing any packaging materials from the cartridge. Insert the cartridge into the housing and tighten the bottom cap back in place using a wrench or pliers. Make sure it is secured tightly to prevent any leaks.
Connecting the filter to the water supply line
Once you have assembled the sediment filter, the next step is to connect it to the water supply line. Follow these steps to ensure a proper connection:
- Locate the main water supply line. This is typically found near the water meter or in the basement.
- Turn off the water supply. You can do this by turning the shut-off valve clockwise until it is fully closed.
- Wrap Teflon tape around the threaded end of the filter housing to create a tight seal.
- Connect one end of a water supply line to the filter housing by screwing it onto the threaded end.
- Connect the other end of the water supply line to the main water supply, using a wrench to ensure a tight connection.
- Turn on the water supply by turning the shut-off valve counterclockwise until it is fully open.
Securing the filter in place with brackets or mounting options
Once the sediment filter is connected to the water supply line, it is important to secure it in place to prevent any movement or potential damage. Depending on the type of filter housing you have, there are several options to choose from:
- Brackets: Some filter housings come with brackets that can be attached to a wall or cabinet. Use screws or nails to secure the brackets in place, ensuring they are level and sturdy.
- Mounting options: If your filter housing does not come with brackets, you can use zip ties or mounting straps to secure it to a nearby pipe or other stable surface.
Make sure the filter housing is securely fastened, yet easily accessible for future maintenance.
By following these steps, you can successfully install a sediment filter in your home’s water supply, ensuring clean and safe water for you and your family.
Testing The Sediment Filter And Checking For Leaks
After successfully installing a sediment filter in your water system, the next crucial step is to test the filter and ensure it is functioning properly. This involves turning the main water supply back on, checking for any leaks in the system, and verifying the sediment filter’s efficiency. Let’s go through each step in detail:
Turning the main water supply back on
To begin the testing process, you need to turn the main water supply on. Ensure that all the valves are in the correct position before doing so. Open the valve slowly to allow a gradual flow of water into the system. This will help prevent any sudden pressure surges and potential damage to the filter or other components of the system. Once the water is flowing smoothly, move on to checking for leaks in the system.
Checking for any leaks in the system
Leaks in the water system can lead to wastage and potentially damage your property. It’s crucial to check for any leaks before proceeding further. Start by inspecting all visible connections and fittings of the sediment filter and the surrounding pipes. Look for any signs of water dripping or moisture. Be thorough in your inspection and pay attention to even the smallest of leaks, as they can worsen over time.
If you notice a leak, identify its source and tighten the affected connection. Use a wrench or pliers if necessary, ensuring not to overtighten as it can cause damage. If the leak persists, consider replacing the faulty part or reaching out to a professional plumber for assistance. Once you are confident that the system is leak-free, you can proceed to verify the proper functioning of the sediment filter.
Verifying proper functioning of the sediment filter
Ensuring the sediment filter effectively removes impurities from your water is essential to maintaining high water quality. To determine if the filter is functioning properly, you can perform a simple test. Fill a glass with water from the filtered outlet and observe it closely. The water should appear clear and free of any visible sediments or particles. If you notice any debris or discoloration, it may indicate a problem with the filter.
In case the filter is not removing sediments as expected, check the filter cartridge for any clogs or damage. Clean or replace the cartridge according to the manufacturer’s instructions. It’s also important to follow the recommended interval for changing the filter to ensure optimal performance.
By following these steps and thoroughly inspecting your sediment filter for leaks and proper functioning, you can have peace of mind knowing that your water is clean and free from impurities. Regular maintenance and timely replacements will ensure the long-term effectiveness of your sediment filter.
Maintaining And Replacing The Sediment Filter
Establishing a regular maintenance schedule for your sediment filter is crucial in maintaining its efficiency and ensuring clean water. By following a few simple steps, you can keep your filter in optimal condition and ensure it continues to remove sediment and other impurities effectively.
1. Cleaning and replacing the sediment filter cartridge
Regularly cleaning and replacing the sediment filter cartridge is essential to maintain the filter’s effectiveness. Over time, the cartridge can become clogged with debris, reducing the flow of water and compromising its ability to remove sediment. To clean the sediment filter cartridge:
- Turn off the water supply to the filter.
- Release the pressure by opening a faucet downstream of the filter, allowing any trapped water to drain out.
- Remove the sediment filter housing by unscrewing the bottom cap.
- Take out the cartridge and inspect it for any visible signs of debris or discoloration.
- If the cartridge is dirty or clogged, rinse it with clean water or gently brush away the sediment using a soft brush.
- If the cartridge is heavily clogged and cleaning is not effective, it is time to replace it with a new one.
- Before inserting the new cartridge, make sure the housing is clean and free of any debris.
- Screw the bottom cap back onto the housing and ensure it is tightly secured.
By regularly cleaning and replacing the sediment filter cartridge, you can ensure the filter continues to work efficiently, providing you with clean and filtered water.
2. Troubleshooting common issues with sediment filters
Even with regular maintenance, sediment filters may encounter common issues that can affect their performance. By troubleshooting these issues, you can diagnose and resolve any problems effectively. Here are some common issues and their solutions:
| Issue | Solution |
|---|---|
| Low water pressure | Check for clogs in the filter cartridge or housing. Clean or replace them if necessary. Also, ensure that the incoming water pressure is adequate. |
| Water bypassing the filter | Inspect the O-rings and gaskets for any damage or improper installation. Replace them if needed. Ensure that the filter housing is tightly sealed. |
| Unpleasant taste or odor in water | Consider replacing the filter cartridge with an activated carbon filter to effectively remove taste and odor-causing impurities. |
Remember to refer to your filter’s manual and seek professional assistance if needed. Regular maintenance and troubleshooting will help you solve common issues and keep your sediment filter working efficiently.
Benefits Of Installing A Sediment Filter
Are you tired of dealing with unpleasant tasting or smelling water? Do you want to protect your plumbing fixtures from damage caused by sediment buildup? Look no further than installing a sediment filter in your home. Not only will it improve the taste and odor of your water, but it will also enhance the lifespan of your appliances and protect the integrity of other water filtration systems. In this article, we will explore the benefits of installing a sediment filter in detail.
Improving the taste and odor of your water
If you’ve ever taken a sip of tap water only to be greeted with an unpleasant taste or odor, you know how off-putting it can be. Sediment filters are designed to remove impurities such as dirt, sand, rust, and other particles that can affect the flavor and smell of your water. By eliminating these contaminants, a sediment filter ensures that every glass of water you drink is clean, pure, and refreshing.
Enhancing the lifespan of appliances and plumbing fixtures
Have you ever wondered why your appliances or plumbing fixtures seem to wear out faster than expected? Sediment buildup in water can wreak havoc on your appliances, causing clogs, corrosion, and reduced efficiency. By installing a sediment filter, you can prevent these issues and extend the lifespan of your appliances and plumbing fixtures. The filter acts as a barrier, capturing sediment particles before they can reach your appliances, thus keeping them running smoothly and efficiently for years to come.
Protecting the integrity of other water filtration systems
If you have invested in other water filtration systems, such as a reverse osmosis unit or a carbon filter, it is crucial to protect their integrity and ensure optimal performance. Sediment filters serve as the first line of defense, removing larger particles that could clog or damage the more delicate components of other filtration systems. By installing a sediment filter, you can effectively protect your investment and ensure that each filtration system in your home operates at its best.
In conclusion, installing a sediment filter offers a multitude of benefits. It not only improves the taste and odor of your water, but also enhances the lifespan of your appliances and protects the integrity of other water filtration systems. Don’t let sediment ruin your drinking water or cause unnecessary damage – take the step to install a sediment filter and enjoy clean, pure water throughout your home.
Conclusion: Clean And Clear Water With A Sediment Filter
Recap of the installation process
Installing a sediment filter is a simple and effective way to ensure clean and clear water in your home. Following the steps outlined in this guide, you can have a sediment filter up and running in no time.
To recap the installation process:
- Start by gathering all the necessary materials and tools, including a sediment filter system, wrench, Teflon tape, and a bucket.
- Turn off the water supply to your home at the main shut-off valve.
- Identify the location where you want to install the sediment filter. This is usually near the main water inlet.
- Attach the filter housing to the mounting bracket using the provided screws.
- Apply Teflon tape to the threaded ends of the inlet and outlet ports on the filter housing.
- Connect the filter housing to the incoming water line using the appropriate fittings.
- Tighten all connections using a wrench to ensure a secure fit.
- Open a nearby faucet to relieve any pressure in the water lines.
- Slowly turn on the water supply at the main shut-off valve and check for any leaks.
- If there are no leaks, close the faucet and let the water flow through the filter for a few minutes to flush out any initial sediment.
- Your sediment filter is now installed and ready to provide clean and clear water throughout your home.
Emphasizing the importance of sediment filters for better water quality
A sediment filter is an essential component of any water filtration system. It plays a crucial role in removing impurities, such as sand, silt, and rust, from your water supply. These particles can not only affect the taste and appearance of your water but also clog your plumbing fixtures and appliances.
By installing a sediment filter, you can significantly improve the quality of your water. The filter captures and traps these contaminants, ensuring that only clean and clear water flows through your pipes. This not only enhances the taste of your drinking water but also protects your plumbing system from damage caused by sediment buildup.
A sediment filter is particularly beneficial for households that rely on well water, as ground sources are more prone to sediment contamination. However, even homes connected to municipal water supplies can benefit from the added protection and peace of mind provided by a sediment filter.
Investing in a sediment filter is an investment in the long-term health and functionality of your water system. With clean and clear water, you can enjoy better-tasting beverages, cleaner laundry, and decreased build-up of sediment in your pipes, faucets, and appliances.
So why wait? Install a sediment filter today and experience the difference it can make in your daily life.
Frequently Asked Questions Of How To Install A Sediment Filter
How Do You Install A Sediment Filter In A House?
To install a sediment filter in your house, follow these steps: 1. Turn off the main water supply. 2. Install the filter housing on the main water line. 3. Insert the sediment filter cartridge into the housing. 4. Tighten the housing and turn on the water supply.
5. Flush the filter to remove any dirt or debris.
Where Should A Sediment Filter Be Placed?
A sediment filter should be placed at the point of entry, near the main water inlet, to ensure all water is filtered before it reaches the rest of the plumbing system.
How Do You Install A Sediment Filter Cartridge?
To install a sediment filter cartridge: 1. Turn off the water supply. 2. Open the filtration system housing. 3. Remove the old cartridge. 4. Insert the new cartridge, aligning it properly. 5. Close the housing and turn on the water supply.
Enjoy cleaner water!
Should A Sediment Filter Be Installed Before Or After Water Softener?
It is recommended to install a sediment filter before a water softener to remove larger particles and sediment. This helps in prolonging the lifespan of the water softener and ensures better water quality throughout the system.
Conclusion
Installing a sediment filter is a simple and effective way to improve the quality of your water. By following the step-by-step process outlined in this guide, you can ensure cleaner and healthier water for you and your family. Remember to regularly maintain and replace the filter to ensure optimal performance.
With a sediment filter in place, you can enjoy the peace of mind that comes with knowing your water is free from impurities. So don’t wait any longer, start installing your sediment filter today and experience the difference it can make in your water quality.