To install a built-in microwave with a trim kit, follow the manufacturer’s instructions and place the microwave inside the cabinet opening, ensuring it is balanced and level. Then, secure the microwave to the cabinet using screws provided with the kit.
Finally, attach the trim kit to the microwave to give it a seamless, finished look. Approximately 120 words: Installing a built-in microwave with a trim kit requires careful attention to detail and following the manufacturer’s instructions. This process involves placing the microwave inside the designated cabinet opening, ensuring it is balanced and level.
Next, it is crucial to secure the microwave to the cabinet using the provided screws, which will securely hold it in place. The final step involves attaching the trim kit to the microwave to give it a sleek, integrated appearance. This trim kit acts as a frame, concealing any gaps between the microwave and the surrounding cabinetry. By completing these steps, you can achieve a professional and sophisticated built-in microwave installation that seamlessly blends with your kitchen design.
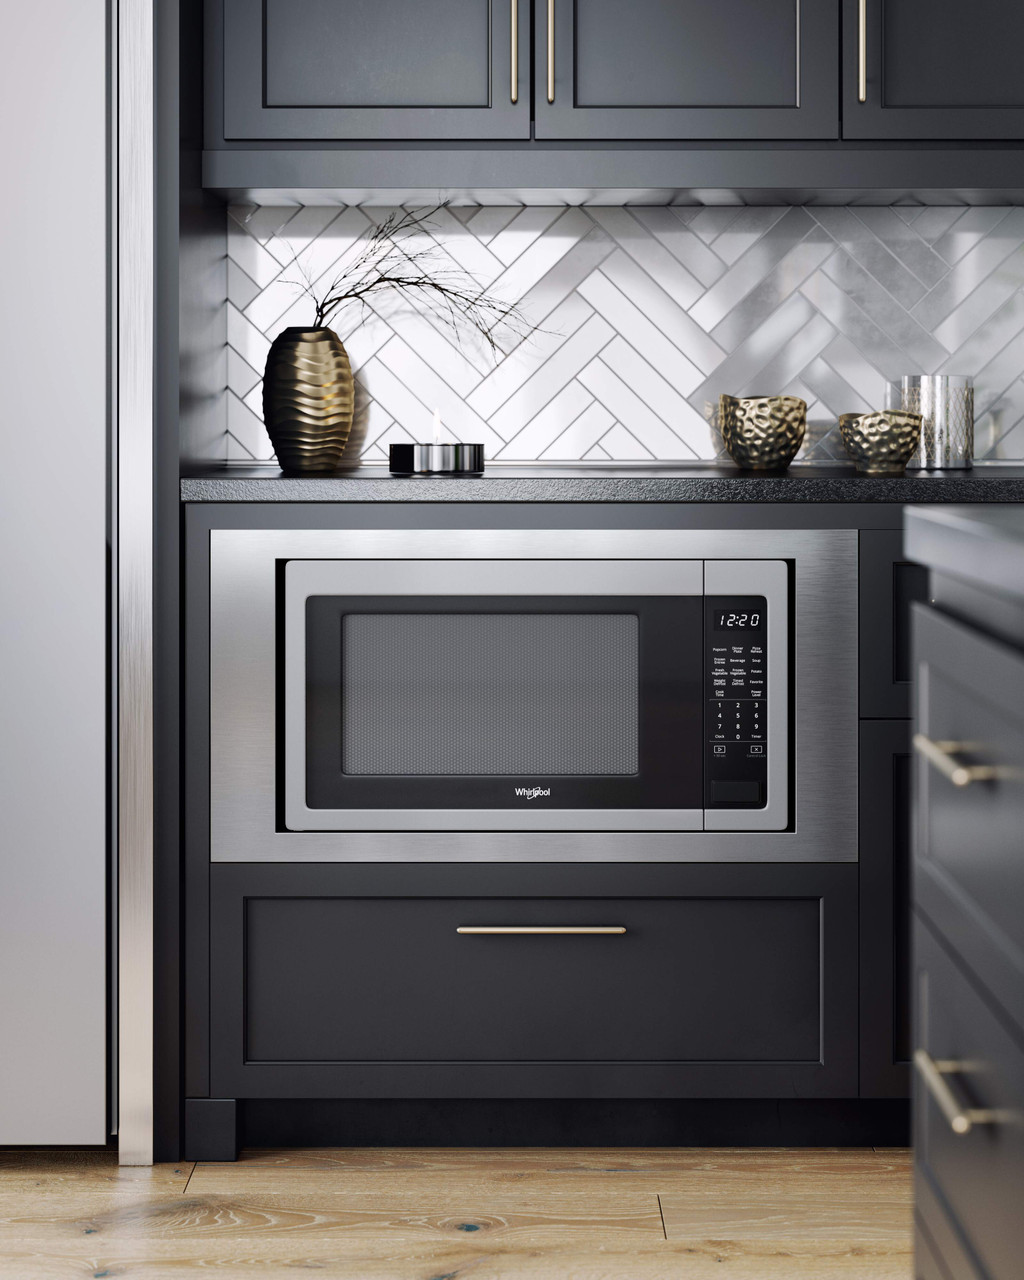
Credit: refrigeratortrimkits.com
Determine The Appropriate Microwave Size And Location
Installing a built-in microwave with a trim kit can be a convenient and space-saving option for your kitchen. However, before you begin the installation process, it’s important to determine the appropriate microwave size and location. You want to ensure that the chosen microwave fits seamlessly into your kitchen and meets your cooking needs.
Measure the available space for the microwave
First, you need to measure the available space in your kitchen where you plan to install the microwave. This will help you determine the maximum dimensions the microwave and trim kit can have. Grab a measuring tape and measure the width, height, and depth of the space. Keep these measurements handy as you start looking for a microwave that fits perfectly.
Consider the desired location of the microwave within the kitchen
Now that you have the measurements, it’s time to decide where you want to install the microwave within your kitchen. Consider both the practical and aesthetic aspects of your kitchen layout. Some common locations for built-in microwaves include above the countertop, built into a cabinet or wall, or even within an island.
- Think about how you typically use your microwave. Do you want it easily accessible while you’re cooking or close to other appliances for efficiency?
- Consider the height at which you want to place the microwave. Installing it above the countertop can save valuable counter space. If you have a tall family, mounting it lower might be more convenient.
- Take into account any existing cabinetry or electrical outlets in the chosen location. Ensure there is enough clearance for the trim kit.
By carefully considering the desired location, you can optimize the functionality and flow of your kitchen while also ensuring the microwave fits seamlessly into the space.
Once you have both the measurements and the desired location in mind, you’ll be well-prepared to find a suitable built-in microwave that fits your needs. Remember to browse through different models and compare their dimensions to ensure that your chosen microwave, along with the trim kit, aligns perfectly with your kitchen space.
Choose The Right Trim Kit For Your Microwave
The right trim kit can make all the difference when it comes to installing a built-in microwave in your kitchen. Not only does it provide a seamless look, but it also ensures that your microwave is securely in place. When choosing a trim kit for your microwave, there are a few factors to consider. Let’s take a closer look at how to choose the right trim kit for your microwave.
Research different trim kit options that are compatible with your microwave model
The first step in choosing the right trim kit for your microwave is to research different options that are compatible with your specific microwave model. Not all trim kits are universal, so it’s important to find one that is designed to fit your specific microwave. To do this, start by checking the manufacturer’s website or user manual for recommendations on compatible trim kits. Additionally, you can also search online or visit appliance stores to explore the different trim kit options available for your microwave model.
Consider the aesthetic appeal and dimensions of the trim kit
Once you have a list of compatible trim kits, the next step is to consider the aesthetic appeal and dimensions of each option. The trim kit should complement the overall design of your kitchen and blend seamlessly with your existing appliances. Consider the finish, color, and style of the trim kit to ensure it matches your kitchen’s aesthetic.
Additionally, you’ll want to take accurate measurements of the available space in your kitchen to determine the dimensions of the trim kit. Measure the width, height, and depth of the area where the microwave will be installed, and compare these measurements to the dimensions provided for each trim kit. This will help you choose a trim kit that fits perfectly and ensures a professional-looking installation.
It’s also important to consider the features and functionality of the trim kit. Some trim kits may offer additional storage space or have built-in ventilation systems to prevent overheating. Evaluate these features based on your specific needs and preferences.
In conclusion, choosing the right trim kit for your microwave involves researching compatible options and considering the aesthetic appeal, dimensions, and features of each kit. By taking the time to find the perfect fit, you can ensure a seamless and professional installation that enhances the overall look of your kitchen.
Prepare The Installation Area
Before installing a built-in microwave with a trim kit, it’s important to prepare the installation area properly. This will ensure a smooth and successful installation process. Here are the steps you need to follow:
Clear out the designated installation area
Begin by clearing out the area where you plan to install the microwave with the trim kit. Remove any items that are currently sitting on the countertop or in the cabinet space. This will provide you with a clean and empty space to work with.
Ensure the area is clean, level, and free from any obstructions
Once the area is cleared, take a moment to clean the surface thoroughly. Wipe away any dust, dirt, or debris that may have accumulated. A clean surface will ensure a secure and stable installation.
Next, check that the installation area is level. An uneven surface can cause issues later on, so it’s important to address this before proceeding. Use a level tool to check for any dips or inclines and make adjustments as needed.
Furthermore, inspect the installation area for any obstructions. Look for electrical outlets, plumbing pipes, or any other potential obstacles that may interfere with the installation process. It’s crucial to have a clear and unobstructed space to work with.
Take precise measurements
Before proceeding with the installation, take precise measurements of the installation area. This will ensure that the built-in microwave and trim kit will fit perfectly. Measure the width, height, and depth of the space and compare it with the dimensions of the microwave and trim kit you plan to install.
By following these steps, you can prepare the installation area for a built-in microwave with a trim kit. Taking the time to clear out the designated area, ensuring it is clean and level, and checking for any obstructions will ensure a successful installation process. Now that your installation area is ready, you can move on to the next steps of installing your built-in microwave.
Mount The Trim Kit Onto The Wall
Installing a built-in microwave with a trim kit not only saves valuable counter space but also gives your kitchen a sleek and polished look. Once you have located the wall studs using a stud finder and marked the position where the trim kit will be mounted, it’s time to securely attach the mounting bracket to the wall. Follow these steps to ensure a sturdy and long-lasting installation.
Locate the wall studs using a stud finder
Before you begin mounting the trim kit, it’s essential to locate the wall studs for added support. A stud finder is a handy tool that helps you identify the vertical beams in your wall. Simply place the stud finder against the wall and move it slowly in a horizontal direction. Once the stud finder detects a stud, it will emit a sound or light up, indicating its presence. Make sure to mark the exact location of the wall studs using a pencil or masking tape for reference.
Mark the position where the trim kit will be mounted
With the wall studs identified, it’s time to mark the position where the trim kit will be mounted. Measure the width and height of the trim kit and use a measuring tape to mark these dimensions on the wall. Use a level to ensure the marks are straight and aligned. This step is crucial to ensure that the trim kit fits perfectly and looks seamless once installed.
Attach the mounting bracket securely to the wall
Now that you have identified the wall studs and marked the position, it’s time to attach the mounting bracket securely to the wall. Place the mounting bracket against the wall, aligning it with the marked position. Make sure the bracket is level and then use a power drill or screwdriver to insert screws into the wall studs. Tighten the screws firmly to ensure that the mounting bracket is securely attached to the wall. This step will provide the necessary support for the trim kit and prevent it from falling or becoming unstable.
By following these steps, you can successfully mount the trim kit onto the wall, creating a seamless and professional-looking installation for your built-in microwave. Remember to double-check the alignment and stability of the mounting bracket before proceeding to the next step of installing the microwave itself.
Install The Microwave Into The Trim Kit
Once you have prepared the trim kit for installation and have all the necessary tools ready, it’s time to install the microwave into the trim kit. Follow the manufacturer’s instructions carefully to ensure a secure and proper installation. Here are the steps to complete this process:
Place the microwave into the trim kit
Begin by placing the microwave into the trim kit, aligning it with the designated slots. Refer to the manufacturer’s instructions for the correct orientation. Make sure the microwave fits snugly into the trim kit, leaving no gaps or spaces between the two. This ensures a seamless and professional-looking installation.
Align and secure the microwave onto the mounting bracket
Next, it’s time to align and secure the microwave onto the mounting bracket. This step is crucial as it ensures stability and prevents any accidental movements or falls. Refer to the manufacturer’s instructions to identify the mounting bracket and its specific location inside the trim kit.
Once you have located the mounting bracket, carefully align the microwave with it, ensuring that all sides and edges are flush. Taking your time during this step and ensuring proper alignment is essential for a secure installation.
After aligning the microwave, use the provided screws or bolts to secure it onto the mounting bracket. Make sure to tighten them properly, but avoid overtightening, as this can damage the microwave or the trim kit. Check the manufacturer’s instructions for the specific torque or tightening requirements, if provided.
Additionally, if your trim kit includes any brackets or additional hardware to further secure the microwave, follow the manufacturer’s instructions to install them accordingly. These additional components often add an extra layer of stability to the installation.
Finally, give the microwave a gentle shake or push to ensure it is securely attached to the trim kit and mounting bracket. If it feels loose or wobbly, double-check the alignment and tightening of the screws or bolts.
By following these instructions and ensuring a proper alignment and secure attachment, you can confidently complete the installation of your built-in microwave with a trim kit. This ensures not only an aesthetically pleasing integration into your kitchen cabinetry but also a safe and stable installation that will withstand daily use.
Connect The Microwave To The Power Supply
Once you have successfully installed your built-in microwave with a trim kit, the next step is to connect it to the power supply. Follow these steps to ensure a safe and secure connection.
Locate the Power Source Nearby
Before connecting the microwave to the power supply, you need to find a suitable power source nearby. Ensure that the power source is easily accessible and has the correct voltage rating for your microwave. Typically, a dedicated 120-volt electrical circuit is recommended. Locate the circuit breaker that controls the power to that specific area and switch it off for safety.
Use Electrical Wiring and Connectors
Once you have located the power source, you need to use the appropriate electrical wiring and connectors to establish a secure connection. This will ensure that your microwave receives a consistent power supply and operates safely. Follow these steps:
- Measure the distance between the power source and the microwave. This will help you determine the length of electrical wire required.
- Purchase electrical wire of the appropriate gauge and length to connect the microwave to the power source. Refer to the manufacturer’s guidelines for the recommended wire specifications.
- Strip the insulation off the ends of the electrical wire using wire strippers.
- Connect one end of the wire to the power source, ensuring a tight and secure connection.
- Feed the wire through the designated hole in the back of the microwave’s cabinet.
- Securely attach the other end of the wire to the corresponding terminal on the microwave. Refer to the microwave’s manual for the exact location of the terminal.
- Double-check all connections to ensure they are secure and tight.
Remember to follow electrical safety precautions while working with live wires. If you are unsure or uncomfortable with the process, it is advisable to consult a qualified electrician.
Connecting your built-in microwave to the power supply is an essential step to ensure its proper functioning. By locating a suitable power source nearby and using the correct electrical wiring and connectors, you can establish a safe and secure connection, allowing you to enjoy the convenience of your built-in microwave with a trim kit.
Test The Functionality Of The Microwave
Ensure that the microwave is properly installed and functioning correctly
To make sure the built-in microwave with trim kit is properly installed and functioning correctly, it is crucial to run a thorough test of its functionality. Testing the microwave not only helps in confirming that it is installed correctly, but also ensures that all the features and settings are working as intended. This step is essential to avoid any inconveniences or issues that may arise later on.Test the various features and settings to ensure everything is working as intended
Once the microwave is installed, the next step is to test its various features and settings. This will help you verify that everything is in working order and that you can rely on the microwave to meet your cooking needs. Here are a few steps to follow when testing the functionality of the microwave:- Begin by testing the basic functions of the microwave, such as heating a cup of water. Fill a microwave-safe cup with water and place it in the microwave. Start the microwave and observe if the water heats up within a reasonable time frame. If the water doesn’t heat or takes an unusually long time, there may be an issue with the microwave’s heating element.
- Next, test the different power levels of the microwave. Most microwaves offer multiple power settings, ranging from low to high. Set the microwave to a specific power level and place a microwave-safe dish with food inside. Cook the food for the recommended time, taking note of how well it is cooked. Repeat this process for different power levels to ensure that each level functions correctly.
- Check the defrosting function of the microwave if it has one. Place a frozen item, such as a piece of meat, in the microwave and select the appropriate defrosting setting. Monitor the item closely as it defrosts to make sure it thaws evenly and efficiently. If you notice any inconsistencies or issues, it is recommended to consult the microwave’s user manual or contact the manufacturer for assistance.
- Test the sensor cooking feature if your microwave is equipped with it. This feature uses built-in sensors to detect the moisture levels and adjust the cooking time accordingly. Place a microwave-safe dish with food inside and select the sensor cooking option for the particular type of food. Monitor the cooking process to determine if the sensor accurately adjusts the cooking time, resulting in evenly cooked food.
- Lastly, check the timer function of the microwave. Set the microwave timer to a specific duration and let it count down. Ensure that the timer buzzes or alerts you when the set time has elapsed. This function is particularly useful when following recipes that require precise cooking times.
Finalize The Installation
Now that you have successfully installed your built-in microwave with a trim kit, it’s time to put the finishing touches on the installation. This final step will ensure that your microwave looks seamless and functions optimally in your kitchen. In this section, we will discuss how to clean and wipe down the exterior of the microwave and trim kit, as well as make any necessary adjustments to ensure proper alignment and leveling.Clean and wipe down the exterior of the microwave and trim kit
After the installation is complete, it’s important to clean and wipe down the exterior of the microwave and trim kit to remove any dust, fingerprints, or smudges that may have accumulated during the installation process. Here are the steps to follow:- Prepare a mild cleaning solution by mixing warm water and a small amount of dish soap in a bucket or spray bottle.
- Dampen a clean, soft cloth or sponge with the cleaning solution.
- Gently wipe the exterior surfaces of the microwave and trim kit, paying special attention to areas that are prone to dirt and grime buildup.
- Rinse the cloth or sponge thoroughly and wring out any excess liquid.
- Wipe down the surfaces again with a clean, damp cloth to remove any soap residue.
- Dry the surfaces with a soft, lint-free cloth to prevent water spots.
Make any necessary adjustments to ensure the microwave is aligned and level
Proper alignment and leveling are crucial for the optimal functioning of your built-in microwave. If the microwave is not aligned correctly, it may not fit properly into the trim kit, resulting in a less than perfect installation. Follow these steps to make any necessary adjustments:- Using a level, check if the microwave is horizontally aligned. If it is not level, adjust the placement of the microwave within the trim kit until it is perfectly horizontal.
- Next, check the vertical alignment of the microwave. Ensure that the top and bottom edges of the microwave are parallel to the trim kit.
- If any adjustments are needed, loosen the screws that hold the microwave in place within the trim kit.
- Gently shift the microwave until it is aligned and level.
- Once the microwave is properly aligned, tighten the screws to secure it in place.
- Double-check the alignment and leveling to ensure everything is perfect.
Troubleshooting Tips
Installing a built-in microwave with a trim kit can enhance the look and functionality of your kitchen. However, like any other home improvement project, it’s essential to be prepared for potential issues that may arise during the installation process. In this section, we will explore some common installation problems and offer troubleshooting tips to help you overcome them. By following these guidelines, you can ensure a smooth and successful installation of your built-in microwave.
Troubleshoot common installation issues, such as uneven mounting or electrical problems
During the installation of a built-in microwave with a trim kit, you may encounter a few common issues that can hinder the process. Here are some troubleshooting tips to help you address these problems:
1. Uneven mounting:
If you notice that the microwave is not sitting evenly or is tilted forward or backward after installation, it could be due to uneven mounting. To remedy this, follow these steps:
- Double-check the mounting bracket’s alignment and make sure it is level.
- Loosen the mounting screws slightly and adjust the microwave’s positioning until it sits evenly.
- Ensure that the mounting screws are securely tightened, but be careful not to overtighten them.
2. Electrical problems:
Electrical issues can sometimes occur during the installation of a built-in microwave. Here’s what you can do to troubleshoot them:
- Check if the power outlet you are using is functioning properly. Plug in another appliance to verify.
- Ensure that the microwave’s power cord is securely plugged into the outlet and that there are no loose connections.
- If the microwave still doesn’t power on, check the circuit breaker or fuse box to see if a tripped breaker or blown fuse is the culprit. Reset or replace as necessary.
- If the electrical problem persists, it is crucial to consult a professional electrician for further assistance.
Follow safety guidelines and consult professional help if needed
As with any electrical installation, it is important to prioritize safety. While troubleshooting common installation issues can sometimes be done independently, remember that there are situations where seeking professional help is the wisest choice. Here are some important safety guidelines to follow:
- Always turn off the power supply before starting any work on the microwave or its electrical connections.
- Refer to the manufacturer’s instructions and follow them carefully to ensure a safe and correct installation.
- If at any point you encounter a problem that seems beyond your expertise, do not hesitate to contact a professional technician or electrician.
By adhering to safety guidelines and seeking professional assistance when needed, you can complete the installation of a built-in microwave with a trim kit efficiently and without compromising safety.
Frequently Asked Questions For How To Install A Built-In Microwave With Trim Kit
Does A Built In Microwave Need A Trim Kit?
No, a built-in microwave does not necessarily need a trim kit. It depends on the model and the design of your kitchen. Some microwaves have a built-in trim kit option for a seamless installation. But if your microwave fits well and looks good without a trim kit, it is not necessary to use one.
Can I Install A Built In Microwave Myself?
Yes, you can install a built-in microwave yourself. Just ensure you follow the manufacturer’s instructions, have the necessary tools, and are comfortable working with electrical connections. However, if you’re uncertain, it’s always recommended to hire a professional for a safe and accurate installation.
How Do You Fill A Gap Between A Microwave And Cabinet?
To fill the gap between a microwave and cabinet, you can use a filler strip or trim kit specifically designed for this purpose. These accessories ensure a seamless fit, maintaining the aesthetic appeal of your kitchen while preventing dirt or debris from accumulating in the gap.
How Do You Make A Countertop Microwave Look Built In?
To make a countertop microwave look built-in, you can use a microwave trim kit. This kit is designed to mount the microwave seamlessly into a cabinet or wall, giving it a built-in appearance.
Conclusion
Installing a built-in microwave with a trim kit can enhance the aesthetics and functionality of your kitchen. By following the step-by-step instructions outlined in this guide, you can easily tackle this DIY project. Remember to carefully measure your space, choose the right trim kit, and use proper safety precautions.
With a little patience and effort, you’ll soon be enjoying the convenience of a sleek, built-in microwave in your kitchen.