To install an ice maker water line, shut off the main water supply, locate the cold-water supply valve, connect the water line to the valve, and then connect it to the ice maker. Installing an ice maker water line is a straightforward process that can be completed in a few simple steps.
By shutting off the main water supply, locating the cold-water supply valve, and properly connecting the water line to both the valve and the ice maker, you can ensure a steady supply of ice without any hassle. We will provide you with a step-by-step guide to help you install your ice maker water line efficiently.
So, let’s get started with the process and have your ice maker up and running in no time.
Credit: www.homedepot.com
Preparation For Installation
Before you start installing an ice maker water line, it’s important to properly prepare in order to ensure a smooth and successful installation. This involves gathering the necessary tools and materials, shutting off the water supply, and identifying the suitable location for the installation.
Necessary tools and materials
Before getting started, gather the following tools and materials:
| Tools | Materials |
|---|---|
|
|
Shutting off the water supply
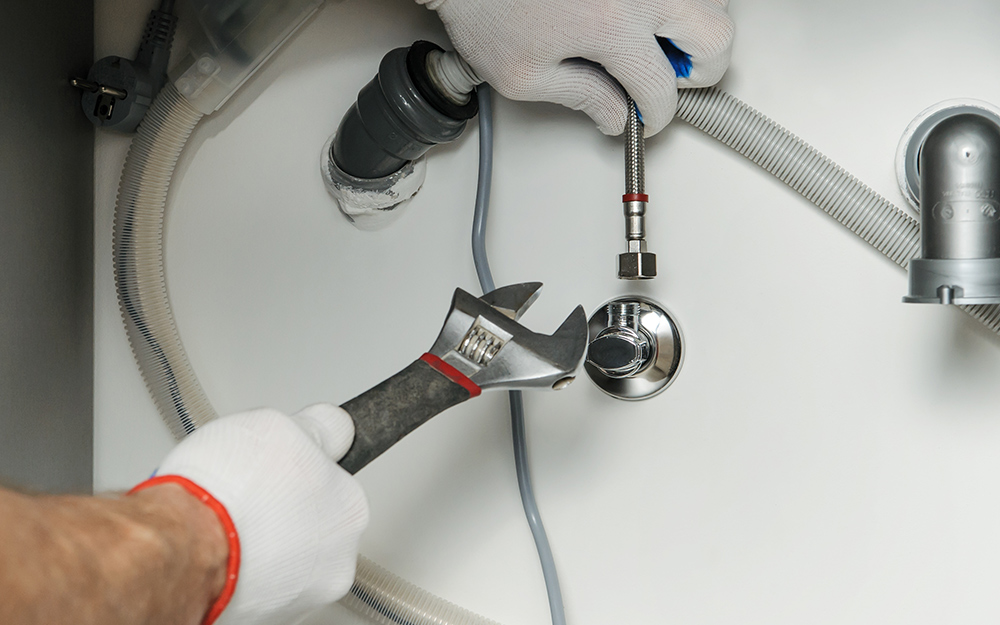
Before beginning the installation, it’s crucial to shut off the water supply to avoid any leaks or accidents. Locate the main water shut-off valve in your home, typically found near the water meter.
Using your adjustable wrench, turn the valve clockwise until it is fully closed. This will stop the flow of water to the entire house, ensuring a safe working environment during the installation process.
Identifying the suitable location
Next, you need to identify a suitable location for the ice maker water line. Find a spot near the refrigerator where you can easily access the water supply line.
Make sure to choose a location that is close to a water source and has sufficient space to accommodate the necessary plumbing connections. Additionally, consider any potential obstructions or obstacles that may hinder the installation process.
Remember, it’s important to install the ice maker water line in an area with sufficient ventilation to prevent overheating of the ice maker unit.
Connecting The Water Line
One of the final steps in installing an ice maker is connecting the water line to your refrigerator. This crucial step ensures that your ice maker has a constant supply of water, allowing it to produce ice efficiently. In this section, we will guide you through the process of routing the water line, installing a saddle valve or a tee valve, and connecting the copper or plastic tubing. Follow these steps to successfully connect the water line and enjoy a continuous supply of ice.
Routing the water line from the supply to the fridge
The first step in connecting the water line is to route it from the water supply to your refrigerator. This involves carefully planning the path the line will take to avoid any obstacles or potential damage. Take into consideration the location of your refrigerator and the distance from the water supply. To route the water line, follow these steps:
- Locate the nearest water supply line.
- Measure the distance from the water supply to your refrigerator.
- Ensure the chosen route is clear of any obstructions.
- Securely attach the water line to the wall or floor using clips or cable ties.
Installing a saddle valve or a tee valve
Once you have routed the water line, the next step is to install a saddle valve or a tee valve to connect the line to the water supply. These valves act as a connection point and allow you to turn the water on or off as needed. Follow these steps to install a saddle valve or a tee valve:
- Locate a suitable area on the water supply line near the fridge.
- Attach the saddle valve or tee valve to the water supply line according to the manufacturer’s instructions.
- Tighten all connections using a wrench to ensure a secure fit.
Connecting the copper or plastic tubing
With the saddle valve or tee valve installed, the next step is to connect the proper tubing to establish the connection between the valve and the refrigerator. Depending on your preference and the available materials, you can choose between copper or plastic tubing. Follow these steps to connect the tubing:
- Measure the required length of tubing needed to reach from the valve to the refrigerator.
- Cut the tubing to the appropriate length using a tubing cutter or a sharp knife.
- Insert one end of the tubing into the valve and tighten the compression nut until secure.
- Insert the other end of the tubing into the water inlet valve on the refrigerator.
- Tighten the compression nut on the refrigerator connection until secure.
It is crucial to ensure that all connections are secure to prevent any leaks. Inspect each connection carefully and tighten as necessary. Once you have completed these steps, you can turn on the water supply and check for any leaks or issues. Congratulations, you have successfully connected the water line to your refrigerator, and your ice maker is ready to produce ice!
Testing And Troubleshooting
Once you have successfully installed your ice maker water line, it’s time to test and troubleshoot the system to ensure everything is working correctly. This step is crucial to avoid potential leaks, water flow issues, or other installation problems. Follow the steps below to efficiently test and troubleshoot your ice maker water line.
Turning on the water supply
To begin, locate the water shut-off valve connected to your ice maker water line. This valve is typically found under the kitchen sink or in the basement. Once you have located it, turn the valve in a counterclockwise direction to gradually open the water supply. Take note that the process may vary depending on your specific water supply setup.
Checking for leaks
After turning on the water supply, carefully inspect the entire water line for any signs of leaks. Check the connections between the water line, shut-off valve, and the ice maker unit itself. Look for any drips, puddles, or dampness around the connections. In case you find a leak, tighten the affected connection or replace any damaged components.
Flushing and purging the water line
Flushing and purging the water line is an essential step to remove any air or debris that may have accumulated during the installation process. To do this, place a container under the water line where it connects to the ice maker. Turn on the ice maker and let it run for a few minutes. This will help flush out any air or impurities from the line. Once you notice a steady flow of water, discard the flushed water that collected in the container.
Troubleshooting common installation issues
If you encounter any problems during or after the installation of your ice maker water line, refer to the following troubleshooting steps:
- Check if the water shut-off valve is fully open.
- Ensure that the water line is securely connected to both the ice maker unit and the shut-off valve.
- Inspect the water line for any kinks or twists that may be obstructing water flow.
- Double-check that the ice maker is properly connected to a power source and turned on.
- If the ice maker still doesn’t produce ice, consider consulting the manufacturer’s manual or contacting customer support for further assistance.
Frequently Asked Questions For How To Install Ice Maker Water Line
How Much Does It Cost To Install An Ice Maker Water Line?
The cost of installing an ice maker water line varies, but it can range from $150 to $300. This includes the cost of materials and labor. Hiring a professional plumber is recommended for proper installation and to ensure a reliable and safe water supply to your ice maker.
How Do You Install A Water Line For A Refrigerator?
To install a water line for a refrigerator, follow these steps: 1. Shut off the water supply. 2. Locate the nearest cold water line. 3. Drill a hole in the wall and insert a water line. 4. Connect the line to the refrigerator’s water inlet valve.
5. Turn on the water supply and check for leaks.
What Kind Of Water Line Do You Need For An Ice Maker?
You need a dedicated water line for an ice maker. It should be connected to a reliable source of potable water.
Do You Have To Connect Ice Maker To Water Line?
Yes, connecting your ice maker to a water line is necessary for it to function properly.
Conclusion
Installing an ice maker water line is a simple and essential step to ensuring a continuous supply of ice in your home. By following the step-by-step instructions provided in this blog post, you can effectively connect the water line to your refrigerator and enjoy the convenience of fresh ice whenever you need it.
Remember to always prioritize safety and consult a professional if you are unsure about any aspect of the installation process. So go ahead, take the plunge and start enjoying the benefits of having an ice maker in your home today!